Sunday, April 19, 2009

Resurgam


After two partially successful attempts at making a biga, or even a flatbread dough that would have sufficient leavening power, I decided to dump all of the French La Vahiné and Greek yeast. One year in San Juan, even in nitrogen filled packages, seems to have put the little yeast cells to sleep--permanently. Welcome to the tropics.

With new Fleischmann's IDY safely opened and in the freezer, the bakery needes some loaves of basic bread with creative pizzas to feel better again.

The Plan

Simple artisan bread that could be combined with our new found source of organic crops should satisfy the needs to get the bakery working again. To keep the day manageable and allow other kitchen prep work, only 3.6kg of dough would be prepared:
  1. 2kg divided into 500gm loaves
  2. 1kg for 100gm filled Parkerhouse rolls
  3. 600gm for pizza rounds
Pre Ferment

A 55% AR (Absorption Ratio) biga of 1kg flour (150gm Whole Wheat) and 850gm Amapola Harina por pan y pizzas, was started with 8gm of Fleischmann's IDY dissolved in 550gm of 40C water with 10 grams of invert sugar syrup.

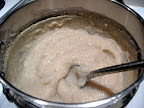
The yeast-water-invert sugar solution exhibited strong foaming at 20 minutes. The biga was mixed 3 minutes then allowed to rest overnight.

This is a stiffer than usual pre-ferment that can rise well over 10 hours without falling. At 10 hours, the aroma is very strong without being sour.


10:49 later, soft and fluffy, but not fallen


And actually, quite hard to make fall...

Mixing

After ~12 hours of fermentation, the biga was slack, but still robust enough to contain the fermentation gasses. The missing flour, water, and salt were computed:

Total dough weight= 3600gm computed at 60% AR. This means 2250 gm flour and 1350 gm (60% of 2250) water.
  • Flour:1000gm in biga + 1250gm in final mix = 2250gm
  • Water: 550gm in biga + 800gm to add = 1350gm
  • Salt @ 2% of flour weight = 45gm
Mix 7 minutes due to the lower peak time of Amapola flours. The final dough was elastic and not sticky. Final temperature was 31C.

Rising

Let rise 1.5 hours, then divided as above.

Forming, proofing, and baking

Loaves were formed in a boule form to save freezer space. Rolls were flattened to Parker House and filled with organic radishes in a fried tomato-chili sauce.


Forming into Parker House shape, adding the radishes, and pinching into rolls

A note on the radish toppings...


Our dedicated organic farmers at Siembra Tres Vidas in Puerto Rico deliver some of the freshest summer radishes (raphanus sativus) we have ever tasted. Radishes however can take a different personality when cooked. Their pungency becomes peppery and nutty (due to enzyme deactivation leaving the glucosinolate undamaged). For this mix:

  • Cut two radishes into batonets (approximately 2mm)
  • Mix with salt and fines herbes
  • Wet with white vinegar
  • Add 15 cc of fried tomato sauce
  • Add 5cc of pureed chile ancho
  • Add 5cc of invert dark sugar syrup


The ingredients. The palette. The final mix.


Pizza Topping


Only two of the pizza toppings merit a special note: Vinegar-sugar syrup garlic and the Obradors chorizo from Barcelona. The remainder are very standard in the repertoire:
  • VITTER tomate frito with added mushrooms
  • Onions marinated with oregano and olive oil
  • Pimentones Españoles sliced in long strips
  • A mixture of mozzarella (low-quality) and pecorino cheese
Soaking thinly sliced garlic in a mixture of vinegar and brown invert sugar syrup takes some of the pungency from the garlic and gives a beautiful caramelization as the pizza cooks. The garlic cooks in a 250C oven to a good color without bitterness.

EMBOTITS OBRADORS chorizo is made only from black swine from the island of Mallorca. The pigs graze freely and are prepared in small batches by hand. There is a history behind the sausage that spans nearly 2000 years. Roman traders reaching the islands with techniques for salting meat, enterprising islanders refining the art, faithful Moors eradicating the practice (and perhaps some of the enterprising islanders; These swine are unclean!), a reintroduction of the idea by the Kingdom of Sicily, followed by the islanders, ever enterprising, refining the art again.

Special note-Mallorcan chorizo gained it deep red color in the 1700's with the addition of red peppers recently arrived on the islands from America.


Garlic in vinegar and invert sugar syrup--
  • Approximately 10 cloves of garlic, with root end trimmed and shaved in a mandolin
  • 50:50 mix of white vinegar and water
  • Salt to 3% (by weight) of vinegar and water
  • Invert brown sugar syrup to cover garlic


The finished products


500 gram loaves and the radish bread


And the pizzas...


Accompaniments

Braised baby cabbage salad with organic romaine and arugula
(all locally, organically grown in Puerto Rico)


Puerto Rico was, and still is a cornucopia. The island has at least eight micro-climates that support tropical fruits through coffee, and even temperate vegetable crops such as broccoli. We are proud member of an agricultural cooperative that supports local farms. Our favorite is Siembra Tres Vidas, from which this produce comes.


  • Extra Virgin Olive Oil--Approximately 50cc, plus some to braise the cabbage
  • Fruit vinegar--About 50cc of high pulp, dark, fruit vinegar (fig, forest fruits...)
  • Salt to taste (finish with herbed salt to complement the pungency of the arugula and cabbage)
  • Pepper--fresh ground upon serving
  • Substandard pineapple wine without salt
    (common in Puerto Rico--Hey, do you think all of the great European peasant food was cooked with Chateau Petrus 1723? The villagers drew wine that was halfway to vinegar from communal casks or demijohns. The point is to have a good reduction source.)
Peel the outer leaves from the baby cabbage and split in two (beautiful). Sprinkle the open faces with salt. Heat a very heavy covered pan and coat the bottom with olive oil. Allow the oil to heat and place the cabbages split-side down. They should make a great deal of sizzling noises.

After 2 minutes, splash a small amount of substandard pineapple wine in the pan, mainly to make steam and add sweetness to the cabbage. Cover the pan and let steam for 7-9 minutes. (Please do not go much past the upper time limit since further cooking reactions will release hydrogen sulfide from the cabbage and degrade the aroma.) Upon completing the steaming, withdraw the cabbage and place on a separate pan. The residual heat in the vegetable will continue the cooking process. The baby cabbage should be softer, but still with body.


Left-Split baby cabbage (about 75mm across), sprinkled with salt.
Right-After braising in substandard pineapple wine


Let the cabbage cool over the next few hours.

Near serving time, clean and hand tear the salads into a salad centrifuge (spinner). Hand tearing makes the salad easier to handle with a fork and much more interesting. If you prefer uniformly cut salad, try a lawnmower. Spin dry the sald and chill.

Mix the oil and vinegar in a separate jar or bowl to make a dressing. Reserve some of the dressing to top the split cabbages. Toss the salads in the dressing separately and finish with your choice of salt. Plate out leaving a small 'hole' in the center of the plate. Place the braised cabbage in the center hole and top with a spoonful of the remaining dressing, finish with salt and pepper.


When we were kings...Gnocchi di Igname

Sometimes a ñame is just a ñame


They were princes and kings, vassals and servants of Africa.

Yet these kings and princes, vassals and servants each ate nyam, a great tuber that could weigh as much as a grown man. Nyam was bountiful. Nyam was plentiful. Nyam could be stored long periods, even in the rainy season when food would be scarce. Nyam could be boiled, mashed, and stewed. Nyam was worshiped.

Princes and kings, vassals and servants, would soon be chained together, some bartered, some captured, to become slaves on the islands of the West Indies or in the English colonies. Those that found themselves cutting sugar cane were somewhat consoled that some of their owners allowed them nyam, which was now called 'inhame' or 'ñame', depending if the slave owner was Portuguese or Spanish. (The owner did not eat it but it did cut costs.) Those that found themselves staring at winter snows in the Virginia colony were not as fortunate. Try as they could to explain 'nyam', the best that could grow in these lands was a orange sweet potato, which, through the corruption of language, became the 'yam' of the US supermarket.

And so, this little bit of culinary deceit continues today. The 'yam' you see canned, or candied, or served once a year with its customary dressing of tiny white marshmallows, is a sweet potato. It is not the nyam of kings, princes, vassals, and servants.

This is an attempt to atone for a part of that history.


Welcome to America! Here is your yam...

Gnocchi di Igname (Italiano)
Ñoquis de Ñame (Español)

Nhoques de Inhame (Portugués)

(The rhyming poetry of these names has to be a marketing advantage)

Gnocchi possibly predate the Roman period. When any food retains its appeal over long periods of history, it usually means it is either essential or very easy to make. Gnocchi, if you were poor met both definitions. Mixing flour, water and the optional egg, then shaping into a dumpling to be boiled in water requires no special equipment or skill.

The arrival of the potato (solanum tuberosum, another solanaceae family member that includes chiles and tomatoes) from the New World in 1536 (1) opened a new world of dumplings for Europe. Primarily it eliminated the need for most, if not all, of the milled flour. Within a hundred years of the potato's arrival in Spain, the Italians had gnocchi di patata, Central Europe had Bryndzové halušky, and the north of Europe had a variety of potato puddings and dumplings. Local cooks boiled the potato, mashed cooked potatoes, or started with shredded raw potaotes to make their national dumplings.

The range of techniques suggests there is more than one way to make gnocchi.

The Gnocchi Cycle

The peasant's gnocchi recipe has been codified to a high degree. Reviewing 20 Italian recipe sites and books shows that the recipe can be summarized thus:

  • Boil some potatoes in their skin (to keep them from getting too wet)
  • When done, peel and rice or mash onto a floured surface.
  • Add about 30% of the raw potato weight in flour
  • Add an optional egg
  • Add optional spices
  • Knead quickly into a dough, roll into long 'rods', cut into section and roll these on a fork to give the characteristic gnocchi shape.
The statistics of the recipes shows the consistency (whatever the potatoes weigh cold is taken as 100% and all other ingredients are measured from them) ...


Ingredient Average SD Median Max Min
Potato 100% 0% 100% 100% 100%
Flour 29% 4% 30% 33% 20%
Egg 5% 5% 6% 12% 0%
Nutmeg Optional


Salt Optional


Pepper Optional


SD--Standard Deviation (66% of all expected recipes will fall within the +/- range of the SD)


The simplicity of the recipe belies the genius of a peasant cook in mastering the delicate dance of starches and water, without understanding what was happening.


The critical elements of the cycle depend on the available 'sticky' starch in potatoes. This starch is called amylose and is distinguished from amylopectin, a waxy type of starch that does not like to make a dough. The changes in starch granules as they are cooked is shown in the small animation:


For reference:

  • Potatoes--Approximately 23% amylose with a gelling temperature of 61C (2,3)
  • Ñame (dioscorea rotundata)--Up to 36% amylose with a gelling temperature of 75-80C. Also, many more minerals and phosphorous than the normal potato (4,5,6,7).
Therefore, we can expect the ñame to give much more starch than the potato, forming a more durable gnocchi. The higher gelatinization temperature means the ñame will have to be cooked further to extract the starches.

The ñame experiments

With the Gnocchi Cycle defined, we will apply the knowledge to making gnocchi with ñame (or igname in Italian). The general nature of the ñame limits some handling:


This small ñame weighs 2kg

A 'small' ñame weighs about 2kg so you are not going to drop it into a pot of boiling water then 'quickly' peel it when it is done. This would be like handling a recently landed meteorite.

As a basis for all the recipes, the ñame was peeled, cleaned then chopped into ~20mm cubes. When cutting, knives become coated with white, milky film showing there is much more starch in ñame than in potatoes.


The cleaned and peeled 1.5kg ñame
Note the starch on the knife...
Recipe variations

To orient future gnocchi di igname recipes, three variations on the preparation technique were studied.

  1. TYPE 1-Cook cubed ñame in a pressure cooker for 15 minutes at 1 atm pressure (normally this will be 121C in a home pressure cooker). This will be well above the gelatinization temperature and will yield a relatively dry mixture.
  2. TYPE 2-Cook cubed ñame in boiling water for 20 minutes. This will be above the gelatinization temperature but will add more water to the final starch.
  3. TYPE3-Grind the ñame raw into a puree, then cook in a double boiler at 90-95C until a gel forms. Use the gelatinized result as the basis for the gnocchi. This will control the amount of starch generated with an unknown amount of water in the final starch.
All recipes use the following ingredients. The gnocchi are made 'plain' to allow comparison tasting afterwards.

  • 500 gm raw ñame
  • 150 gm all purpose flour (Amapola Todo Uso), or as needed
  • 30 gm of beaten egg (about 1 ounce)

TYPE 1 - Steamed ñame base

Place the ñame in the pressure cooker, well above the water level. You can do this by putting a 'spacer' in the water under the pressure cooker tray, then lining the tray with an aluminum foil basket. The foil should be perforated to allow the steam to penetrate and condensed water to drain out of the ñame. Place the ñame in the foil basket, gently fold over the foil to allow the lid to seal, and begin cooking. Measure the cooking time from when the pressure regulator begins rocking (Presto) or when your pressure cooker reaches 15psi (1 atmosphere pressure). When 15 minutes are up, let the pressure drop on its own. Do not cool the pressure cooker with water since this may lead to explosive decompression of the ñame. It will not hurt you, but you will have a mess inside the pressure cooker.


Building the spacer. Note the water in the bottom of the pressure cooker to make steam


The aluminum foil basket and the finished ñame after 15 minutes at 121C

The ñame darkens slightly under steam. Remove from the pressure cooker and rice as in the normal gnocchi recipe.


Riced Type 1 gnocchi di ñame


Ricing the steamed ñame gave a coarse, crumbly dough. Only 70 gm (14%) of flour were required to make a manageable dough with the egg.


The gnocchi dough is manageable, but stiff

The gnocchi were easy to form and presented well before freezing.


TYPE 2 - Boiled ñame used as a base for gnocchi

This is the traditional potato recipe with the exception that the ñame are cooked peeled and cubed. 500 gm of ñame were boiled in plain water for 20 minutes, drained hot, and immediately riced. The beaten egg was added to the riced ñame and enough flour added to make the dough manageable.


Ñame were boiled for 20 minutes, then drained

Only 120gm of flour were needed to make a manageable dough. Gnocchi were easy to form, but the dough was very soft, leaving the gnocchi rolling marks indistinct.


The boiled ñame dough requires more flour, but is softer and more pliable


Type 2 gnocchi are acceptable, but less well formed


TYPE 3 - Ñame puree cooked above the gelatinizing temperature

This is the most unusual of the techniques since it borrows heavily from the Central European practice of shredding and grinding potatoes raw and using the resulting paste as the starting point for dumplings.


500gm of ñame were mechanically shredded in a Cuisinart. The shredder plate was replaced with chopping blades and the shredded ñame was blended into a puree. 50gm of cold water were added in this stage to allow the Cuisinart to effectively 'mill' the ingredients. Starch granules can be mechanically damaged and the intent was to free up amylose starch before cooking.


The ñame puree with 50cc water (10% of weight) after 1 minute at high speed.


Cooking the puree should complete the release, or gellification/gelatinization of the remaining ñame starch. Since starch will scorch when cooked on an open flame, the puree was heated in a double boiler. The upper pot in this boiler reaches ~90C.


90C is above the gelling temperature. As you stir, the puree requires the addition of water and changes from white to translucent as the starch granules breakdown

The literature notes ñame starch granules are more resistant to breakdown than potato or corn starch. This was well proven by the amount of time required at 90C to turn the starch from white to translucent. The total time was 45 minutes and an additonal 150 gm (30%) of water was added during cooking to keep the mixture from becoming too thick.

What is very pretty is the change of the ñame color from white to translucent as the starch granules explode. (A pure ñame starch would make a very good sauce thickener since it is extremely clear and very strong.)

At the end of the 45 minutes, the gelled puree was sprinkled on the floured board and the gel 'chopped' into small chunks. Egg and flour were added to make a manageable dough.


Chopping the gel into some flour. If you look closely, this is really translucent.

Due to the water used to keep the gel manageable in the double boiler, this dough required 180 gm of flour to make a good dough (33% of ñame weight). However, the dough was easy to handle, cut well, and formed reasonable gnocchi.


TYPE 3 rolled into a stick ready to be cut and formed into gnocchi (using the fork on the right side of the picture).


TYPE 3 make acceptable gnocchi.


Final Notes

The gnocchi di igname were individually frozen and stored for a parallel tasting later.

  • Ñame has a tendency to darken under cooking. This is well known and could be counteracted by adding a mild acid to the water (white vinegar, lemon juice, or sodium bisulfite...).
  • All three methods made an acceptable gnocchi, with the difference being the amount of water available for the flour. Steamed ñame (TYPE 1) could take the least flour, while the double boiler gel (TYPE 3) the most.
  • All the variants take less flour than potato based gnocchi. This correlates well with the increased amount of starch in ñame, as well as ñame starch's higher gelling temperature.
  • Controlling the amount of water absorbed by the cooked ñame is critical to making a consistent gnocchi dough. Steaming leaves the least water. Boiling gives a good result, but would be dependent on the chunk size of the cut ñame. The gelling method tends to require more water, if only to keep the gel manageable.
TYPE 1 notes

  • These worked into a coarser, more rigid dough. It is assumed that during the final cooking, these will reabsorb water and have an acceptable texture.
  • TYPE 1 may be more resistant to freezing due to the lower water content will limit syneresis or retrogradation.

TYPE 2 notes

  • These very closely replicated a classic gnocchi dough while using less flour.
  • The higher amount of ñame starch did make this type harder to handle.

TYPE 3 notes

  • An interesting method that could allow the addition of numerous natural colors during the gelling stage. These could be seppia (squid ink), tomato juice, spinach juice, etc. The stronger ñame starch would hold these colors in its amylose gel.
  • The double boiler method tends to require more water in the cooked gel. This results in more flour being used and may (not tasted yet) lead to a more 'floury' gnocchi.

Cooking Results

The gnocchi were frozen and stored for 6-8 weeks (while we ate other things) at -18 to -20C. A visit from the children gave us the opportunity to cook the gnocchi in three separate batches with just a fresh pesto as a comparison sauce.

  • Type 1--These cooked in approximately 2 minutes (to floating gnocchi). The texture was very light and the gnocchi were very delicate as they were drained. Of all the types, this gnocchi had the best texture and had a wonderful nutty taste that blended extremely well with the pesto.
  • Type 2--These cooked in a little over 2 minutes (to float). The texture was similar to classic gnocchi and could be handled with little difficulty. The gnocchi presented well with pesto, yet the additional flour used in Type 2 made these taste as classic potato gnocchi (which was a shame, since gnochhi di ñame have an excellent taste on their own.)
  • Type 3--The most resistant gnocchi to cooking. The additional flour required this type to cook over 3 minutes. These were heavy and doughy since the cooked ñame slurry required a large amount of flour to make manageable gnocchi. These were the least desirable of the three types.
Summary:
Use of steamed ñame in TYPE 1 made the most delicate and flavorful gnocchi. The low water content required much less flour than usual to make dough, and therefore allowed more of the ñame texture to come through.

All types of gnocchi could remain frozen with little degradation of flavor or quality.